Manual Water Borehole Drilling Design and Construction
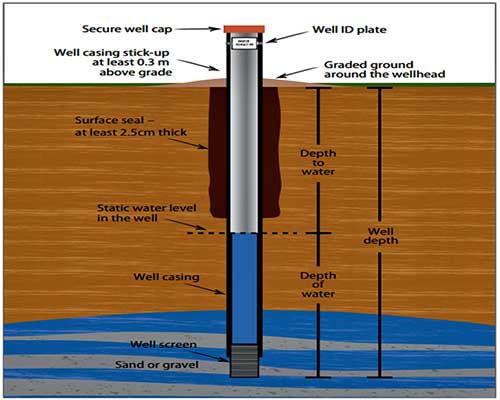
To achieve a good well design, a drilling log should be completed, a drilling log during the actual drilling process, from the drilling logs, the exact depth and length of the well screen, the depth and thickness of the gravel pack and sanitary seal can be determined.
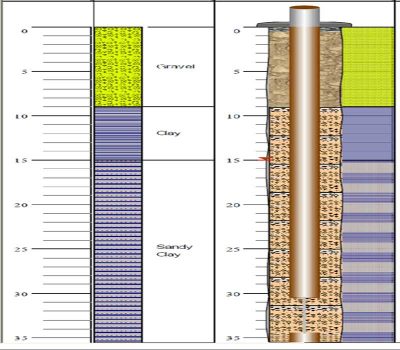
Borehole diameter
The internal diameter of the PVC well casing is selected to fit the outer diameter of the pump that is going to be installed. The drilled diameter of the borehole in turn depends on the outer diameter of the PVC well casing. For the diameter of the borehole, it is important to realize the following:
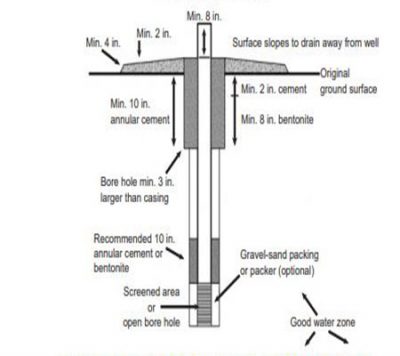
The drilled diameter of the borehole should be at least 2-inch larger than the outer diameter of the PVC well casing to be able to place the gravel pack and sanitary seal. If this rule is not applied and the space between the PVC well casing and the borehole wall is too small, it is almost impossible to place the gravel pack and sanitary seal at the correct depth. Furthermore, the backfill may get ‘stuck’ on its way down (this is called ‘bridging’) and end up in the wrong position.
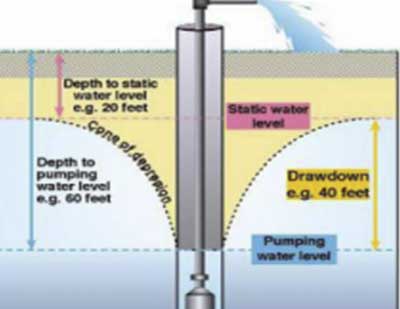
Borehole depth
When the final depth for the bottom of the well-screen in the aquifer is reached, an additional two meter should be drilled. This is to allow for fine soil particles, suspended (mixed with the water) in the borehole, to settle prior to and during the installation of the well-screen and casing, by doing so, the determined well-screen depth can be maintained, and to accommodate a sump.
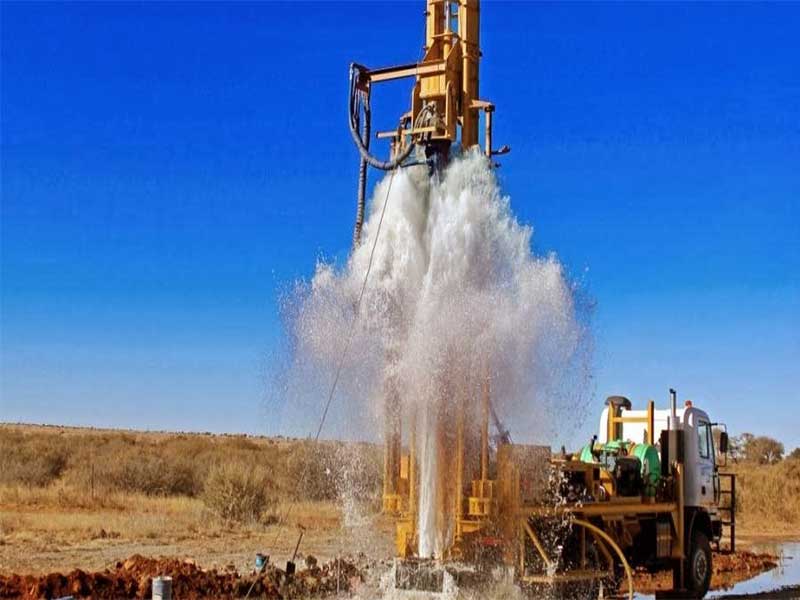
Drilling the borehole to depth
Finally, before the drilling pipes are lifted, the fluid used to drill borehole should be flushed with clean water to remove all fine particles that are suspended in the hole. If this is not done, the particles will settle at the bottom of the well influencing the final installation depth or enter the well-screen during the installation of the well casing.
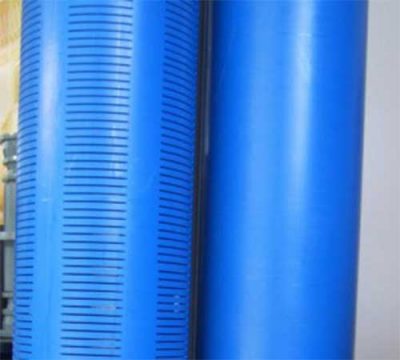
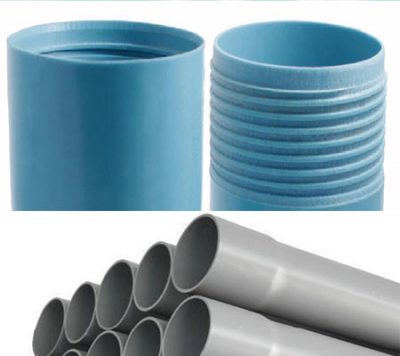
Materials: PVC well-screen and casing
Several different PVC pipes exist, varying from cheap drain pipes to expensive, high class, slotted well screens and casing pipes.
For a potable water well use by a single household or a few households a deeper hole may be needed. In this case a self-slotted 4-inch PVC pipe can be used.
In large water projects (for Governments or NGOs) for communal potable water wells, equipped with a high horse power submersible pump, a deeper hole is needed 5 to 6-inch standard factory slotted PVC well casing pipes are often required (to maximize yield, to ensure high construction quality, and to accommodate the pump). These wells will be significantly more expensive, but of better quality.
Slots are the openings in the well-screen which allow groundwater to flow into the well. In theory the slot size (width) should be smaller than the mean size of the soil particles. However, in some countries only 1 factory-made slot size (1mm) is available. For low-cost wells, one can make the slots by hand using a hacksaw.
Sump
To increase the lifetime of the well-screen, it is advised to attach a 1-meter sump at the bottom of the well-screen, into which any particles entering the well screen from the aquifer can settle, without blocking the well-screen and pump.
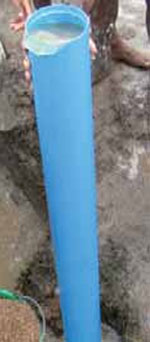
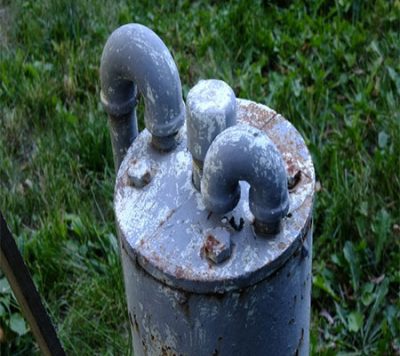
The sump simply consists of a 1-meter plain PVC pipe, which is closed at the bottom end. To close the bottom of the sump a factory-made wooden or PVC cap can be inserted. Alternatively, the bottom end of the sump pipe can also easily be closed by some cutting and bending. Make 4 cuts in the bottom part of the sump pipe and heat the pipe end. Fold the four parts inside and allow the parts to cool (see photo).

Alternatively cut out 6-8 triangular parts. The remaining parts can be bent together to a point. Making a point will reduce the risk of ‘scraping’ the borehole wall when the well-screen is lowered into the borehole. To completely seal the bottom of the sump 10 cm of cement mortar should be poured in the sump.
Pipe joints
Casing and well-screen pipes are usually joined by glued sockets. The more expensive purpose-made casings and well-screens with a wall thickness of at least 5 mm are threaded. When the pipes are glued together, it is very important to clean and roughen both ends, the inside of the socket and the outside of the pipe to be glued. Then, put sufficient glue all around on both ends and put the pipes together in one move.
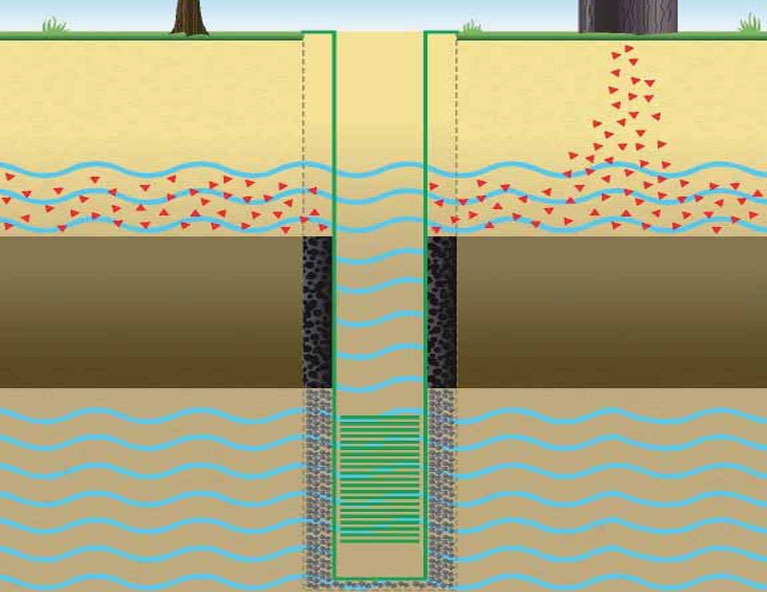
Gravel pack
The gravel pack fills the space between the aquifer (sand particles) and the well screen preventing the wall of the hole from collapsing on to the well-screen and may serve to filter some of the fine sand particles from entering the well.
The gravel should consist of a grain size (generally 1.5 – 3mm) which is just larger than, and no more than twice to three times, the slot size of the well-screen. Good size gravel looks more like coarse sand, rather than gravel. The grains are best when round in shape. Such material can often be found on river beds or lake shores. The best way to prepare suitable gravel is using maximum and minimum sized sieves (grains which are too small or too big are sieved out).
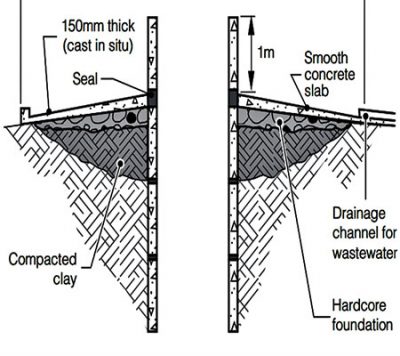
Sanitary seal
It is essential to install a sanitary seal if the well needs to yield good quality water. The sanitary seal can consist of cement-water mixture (cement grout).
The water and cement are mixed until a thick slurry is created (26 liters of water to one 50 kg bag of cement will make about 33 liters of cement grout). If cement grout is used as a sanitary seal, first a half meter of clay should be back filled on top of the gravel pack to prevent the grout from penetrating the gravel pack.
Water Borehole Construction
Step 1, Preparations
Prepare all materials needed for the installation and backfilling. Measure out the effective length of the PVC pipes and cut the last pipe to a length, allowing 1 meter to be left above ground level, after installation. Number the pipes in order of installation.
Centralization of the well screen
To prevent the slots from becoming blocked with clay due to scraping of the well screen against the borehole wall during installation, the well-screen should be centralized. Centralizing the well-screen in the borehole also allows the gravel pack to settle equally around the screen, leaving at least 1-inch of gravel all around the well-screen. Centralization can be achieved by attaching spacer rings or centralizers with an interval of every 3 meter around the well-screen. The spacer rings can be made of PVC rings, which can be attached on 4 sides around the well
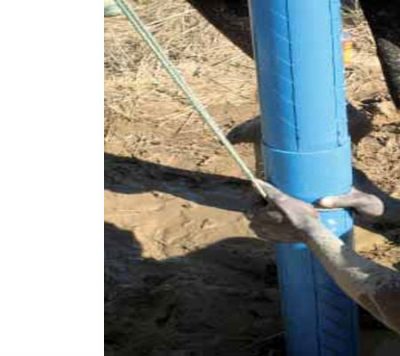
Step 2, Installation of the PVC pipes
A practical method of lowering the PVC pipes into the borehole is to use a rope (see picture). One end of the rope is attached to the drill rig and the other end is wrapped three times around the pipe to form a self-closing loop. The rope is used to prevent the casing and screen slipping into the borehole while adding a new length of pipe. Install all the prepared pipes, and leave 1 meter (see step 1) of pipe above ground level so that the well-screen is placed at the correct depth.
Step 3, Cleaning and flushing the well-screen
When the well-screen has been installed at the correct depth, the pipes and screen should be flushed in the case of fluid drilled boreholes. Pour water into the PVC pipes and allow the dirty water to overflow out of the borehole. If the added water only enters the well slowly (or not at all), this could indicate blockage of the well-screen slots by clay or fine material from the borehole wall. Extra water pressure in the casing and well-screen should then be created by adding a plunger or surge block (or simply a plug of cloth), which is then moved up and down in the casing. Repeat this process until the water directly flows away when added. Continue flushing with clean water until the water which is coming out of the borehole is clean. Only then the gravel pack should be installed.

Step 4, Installation of the gravel pack
The gravel pack is now poured in the annular space around the pipe. At the same time the PVC pipe is moved from side to side to guarantee an easy passage for the gravel down to the screen. Pour in the gravel slowly, to prevent bridging (gravel getting stuck at the wrong level). Use the measurement tape or tool to measure the depth to the top of the gravel and fill to 1-2 meter above the top of the well-screen.
In fluid drilled holes, water will overflow from the PVC casing pipe, as the gravel is dropped around the well-screen. Water will stop overflowing the PVC casing pipe when the entire length of the well-screen has been backfilled.
Step 5, Installation of the sanitary seal
When the gravel pack has settled to the right depth (always measure!), the sanitary seal can be installed Prepare the cement grout and pour it into the borehole in the same way (if cement grout is used for the sanitary seal remember to use clay for the first half meter on top of the gravel pack!) Measure to ensure the sanitary seal was installed at the right depth.
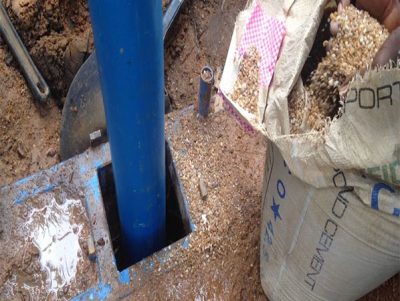
Step 6, Filling the annular space
The rest of the annular space is filled up by cuttings and cement grout (see below). Always pour in the material slowly, while moving the casing to prevent bridging of the material.
Step 7, Installation of the top seal
A sanitary top seal of 3-5m thickness should be placed from 3-5m below ground to the surface. The top seal is usually made of cement grout.
Step 8, Well development
‘Well development’ is necessary to maximize the yield of the well and optimize the filter capacity of the gravel pack. This is achieved by removing the fines and drilling fluid additives, and settlement of the gravel pack.
After drilling some of the fines and drilling fluid additives remain behind in the borehole and are blocking the pores of the surrounding aquifer and the new installed gravel pack. After they have been removed by well development the water will be able to move freely from the aquifer to the well screen. During well development also the gravel pack will settle and become more compacted, ensuring that there are no large voids into which aquifer material (sand) could later collapse. The settled gravel pack will filter out some of the fines from the aquifer. During flushing of the well-screen and the borehole, already some of the fine particles and drilling fluid additives were removed. However, normally this first well development is not enough and more extensive development needs to be carried out after completing the installation process. The remainder of well development takes place after the backfill has been placed and the cement grout of the sanitary seal has hardened (this hardening process takes at least 24 hours).
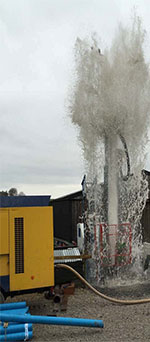
Several techniques are available for well development, The most effective technique is airlifting: Airlifting is a very suitable development tool, by which high flow rates and shock waves can be established with a compressor.
Step 9, Construction of the head works and Well cap.
Finally the head works and well cap should be installed. This apron will prevent surface water and contamination to flow into the borehole directly.
Talk to us for your upcoming project in Water Borehole Drilling
Geodata Evaluation & Drilling LTD. offers water borehole drilling services. Let us handle the project for you. contact us at www.geodatadrilling.com Phone: +234 8037055441